Introduction - 1.1 Techo. Introduction
- 1.2 Android - Introduction
- 1.3 Architecture
- 1.4 Application Components
- 1.5 Hello World Example
- 1.6 Project Structure
- 1.7 Android Tools
- 1.8 App Workflow
- 1.9 Multiple Screens Support
- 1.10 Organizing Project
- 1.11 App Debugging
- 1.12 Interview Questions
- 1.13 Creating Emulator and Mobile
- 1.14 Road Map
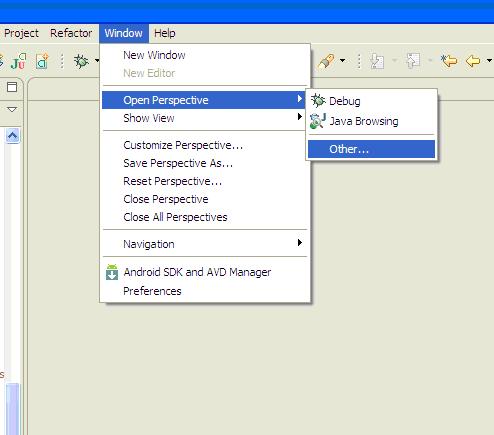
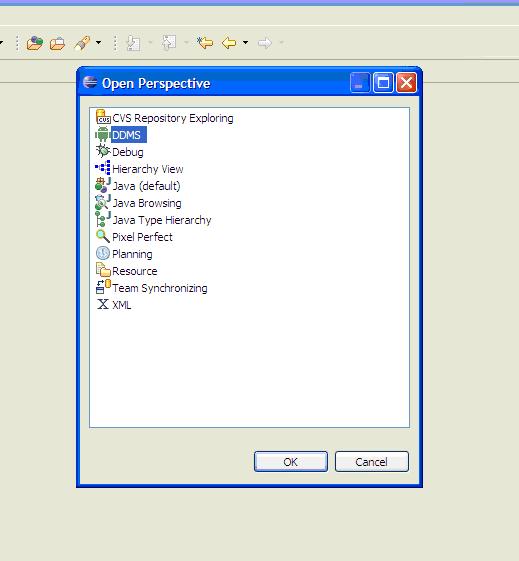
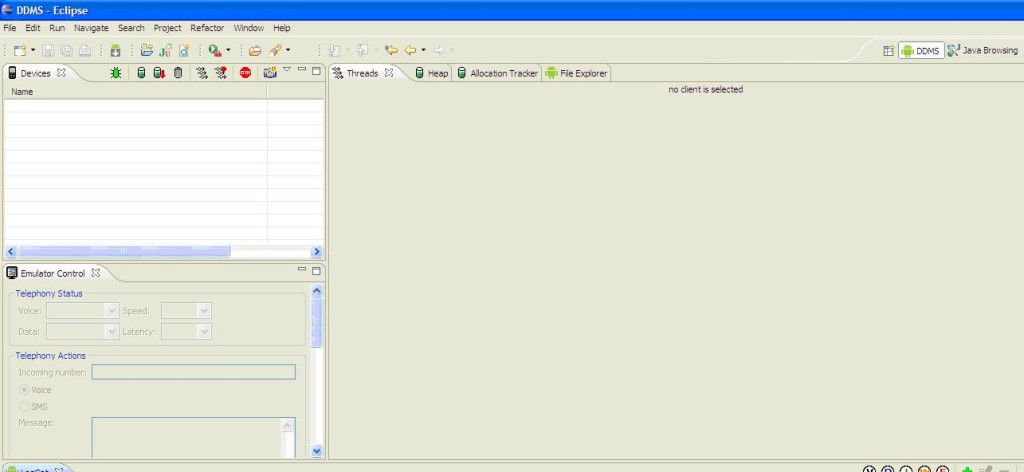
What is DDMS?
Android provides a debugging tool called the Dalvik Debug Monitor Server (DDMS). Advantages of DDMS : Screen capture on the device,Logcat. How DDMS works : To use DDMS open the perspective DDMS : go toWindow->Open Perspective->Other, DDMS
Creating and launching android AVD emulator in eclipse
What is Android Virtual Device (AVD)?
An emulator acts as a real Android device (in most cases) and allows us to run and test the application without having a real device.
- 1. Before launching the emulator, you must create an Android Virtual Device (AVD) which defines the system image and device settings used by the emulator. Some of the settings are,
- configure the version of the Android system
- size of the SD card
- set of hardware options
- emulator skin
- screen resolution, etc
- 2. You can define several AVD with different configurations and can start them in parallel.
- 3. Starting a new emulator is very slow, because the file system of the new AVD needs to get prepared.
Installing an Android System Image (Required)
Before you create an Android emulator, you need to install an Android system image that your emulators can use.Follow these steps:
1. Start the Android SDK Manage
2. In the packages tree, locate and check the ARM EABI v7a System Image node within the first Android node in the list.
For example: Android 4.2.2 (API 17) or Android 4.3 (API 18)
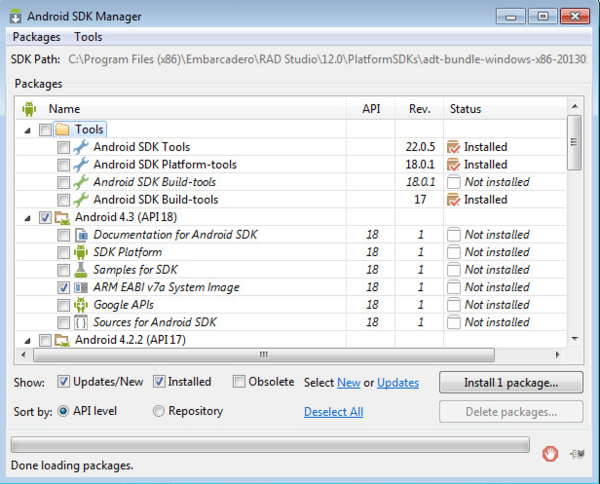
3. Click Install 1 package. (Clear any checkboxes that were auto-selected.)
4. In the Choose Packages to Install page, click Accept License, and then click Install to install the system image.
Google API
If your application uses functionalities provided by Google API such as, Google Maps API, Cloud to Device Messaging (C2DM) then you must create an AVD created for the Google API's.
Creating an Android Emulator Using the Android Virtual Device Manager
Follow the steps below to create a new AVD,
1. In Eclipse, select Window -> AVD Manager.
2. Click New
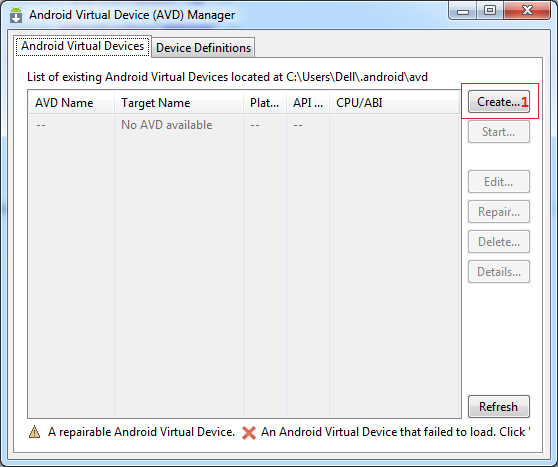
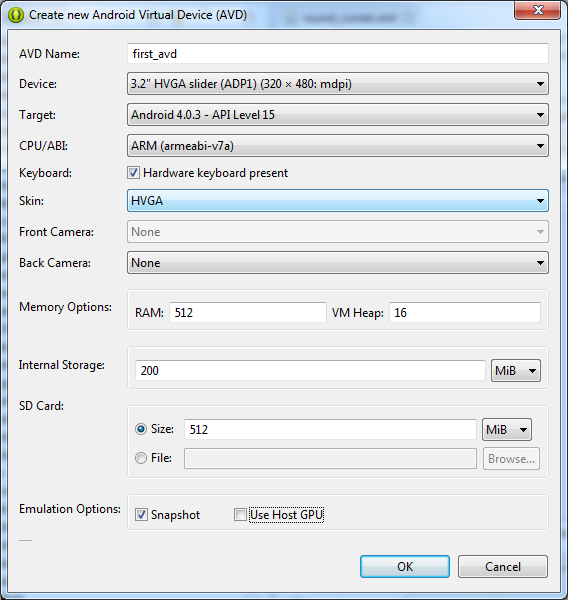
The Create New AVD dialog appears. Type the name of the AVD, for example first_avd.
Choose a target.(The target is the platform (that is, the version of the Android SDK, such as 2.3.3) you want to run on the emulator. It can be either Android API or Google API)
[Optional] an SD card size, say 400
[Optional] Snapshot.Enable this to make start up of emulator faster.
[Optional] Skin.
[Optional]You can add specific hardware features of the emulated device by clicking the New button and selecting the feature.
Click Create AVD.
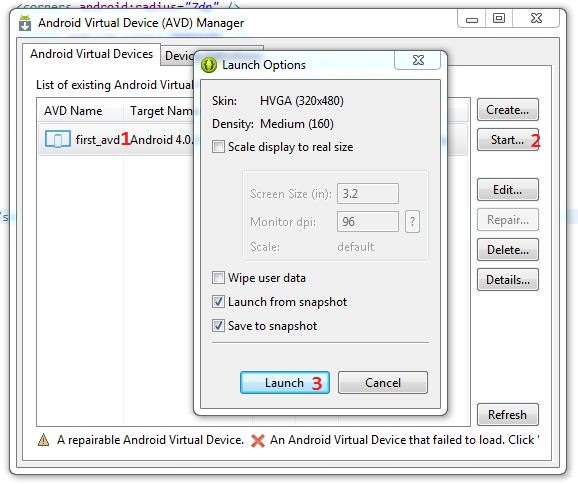
Launch Android AVD (Emulator)
After creating a new Android AVD, you can launch it using Android AVD Manager. Open Android AVD Manager either from Installation directory or Eclipse IDE and follow the steps as shown below.
App types
The first beta version of the Android Software Development Kit (SDK) was released by Google in 2007 where as the first commercial version, Android 1.0, was released in September 2008.The code names of android ranges from A to L currently, such as Aestro, Blender, Cupcake, Donut, Eclair, Froyo, Gingerbread, Honeycomb, Ice Cream Sandwitch, Jelly Bean, KitKat and Lollipop. Let's understand the android history in a sequence.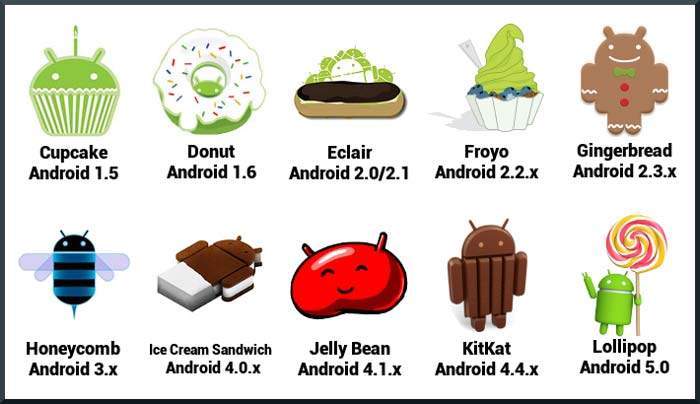
| Platform Version | API Level | VERSION_CODE |
|---|---|---|
| Android 5.0 | 21 | LOLLIPOP |
| Android 4.4W | 20 | KITKAT_WATCH |
| Android 4.4 | 19 | KITKAT |
| Android 4.1 - 4.3 | 16-18 | JELLY_BEAN |
| Android 4.0 - 4.0.4 | 14-15 | ICE_CREAM_SANDWICH |
| Android 3.0 - 3.3 | 11-13 | HONEYCOMB |
| Android 2.3 - Android 2.3.4 | 9-10 | GINGERBREAD |
| Android 2.2.x | 8 | FROYO |
| Android 2.0-2.1 | 5-7 | ECLAIR |
| Android 1.6 | 4 | DONUT |
| Android 1.5 | 3 | CUPCAKE |
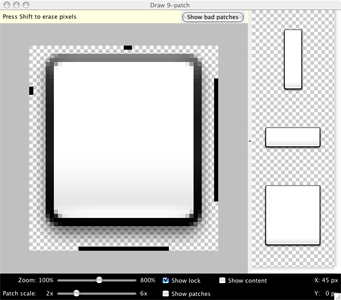
Draw 9-patch
The Draw 9-patch tool is a editor that allows you to create bitmap images that automatically resize to accommodate the contents of the view and the size of the screen.Selected parts of the image are scaled horizontally or vertically.
Here's a quick guide to create a NinePatch graphic using the Draw 9-patch tool. You'll need the PNG image with which you'd like to create a NinePatch image.
- 1. From a terminal, run the draw9patch command from your SDK
sdk/toolsdirectory to launch the Draw 9-patch tool. - 2. Drag your PNG image into the Draw 9-patch window (or
File > Open 9-patch...to locate the file). Your workspace will now open.The left pane is your drawing area, in which you can edit the lines for the stretchable patches and content area. The right pane is the preview area, where you can preview your graphic when stretched.
- 3. When done, select
File > Save 9-patch...Your image will be saved with the .9.png file name.
- Zoom: Adjust the zoom level of the graphic in the drawing area.
- Patch scale: Adjust the scale of the images in the preview area.
- Show lock: Visualize the non-drawable area of the graphic on mouse-over.
- Show patches: Preview the stretchable patches in the drawing area (pink is a stretchable patch).
- Show content: Highlight the content area in the preview images (purple is the area in which content is allowed).
- Show bad patches: Adds a red border around patch areas that may produce artifacts in the graphic when stretched. Visual coherence of your stretched image will be maintained if you eliminate all bad patches.